Friday, May 27, 2016

National Simultaneous Storytime 2016 - Hats

This was such a great theme for this year's ALIA National Simultaneous Storytime.  Each year a book is chosen to be read around Australia at the same time.  This year the book was I got this hat by Jol and Kate Temple


Lots of things happened around my library service. Fireman came to read the story and bought along their helmets, staff wore hats of all types for the occasion, children were encouraged to bring a hat.
I performed a little drama where I was continually being called my another librarian that the children knew, who was inviting me different places and I had to dress appropriately, at least in terms of my head wear.  In the one-woman-play I was invited along to a safari, the beach, to see my friends new house, to help do her washing, to visit a castle, to a halloween party and to rescue her son from pirates each time I adorned a different hat in preparation only to have my librarian friend phoning my to change her mind all the time.

Science Experiment:

This week I linked my science exploration to hats that protect and who needed more protection than Humpty Dumpty as he sat on his wall.
Would Humpty have needed to be put back together again if he was wearing a hat or helmet of some kind?
We looked at a bicycle helmet and talked about the different parts. A bike helmet is made up of two parts a hard outershell and a soft inner lining.  The hard part is to spread the force of the impact over a larger area so that your head doesn't break.  The softer part squeezes in when you hit your head and absorbs the impact energy so that there is less impact going  to your head.
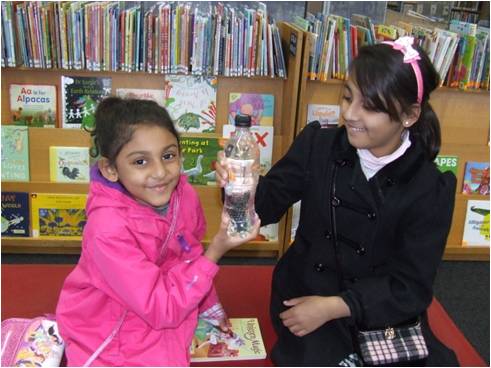
We made a helmet for Humpty using using an egg carton helmet that was padded with a bit of foam so we had a hard layer and a soft layer just like the bike helmet. 
The pictures tell the story of what happened.

With a helmet: 


Humpty Dumpty sat on the wall
Humpty Dumpty had a great fall
All the Kings men, they shouted "Hooray"
"Humpty was wearing a helmet today"


 Without a helmet:


Craft Ideas:

Lots of ideas on the NSS website
Make a newspaper hat.


Friday, April 15, 2016

Hair

Hair is amazing it comes in so many colors and textures: curly, straight, red, brown, short, long. And you can style it in so many ways.  I am rather lazy when it comes to my own hair.  I like to have a wash and wear style which doesn't take me long to do in the morning.  For that reason (and because my husband likes it), I have long hair.  I wash it every other day and gather it up in an elastic at the back and twist it into a bun.  Yes I am a bun-wearing librarian.  Everyday I wear my favourite hair accessory, a clip made of steel and brass that I bought at the St Kilda Esplanade market.  This is what I wear day in, day out. 
So for the hair theme I thought I would do something different so I teased my hair right out so it was a fluffy halo around my head.  I was a little self conscious as I walked out to storytime and greeted the children.  But they didn't say a word, perhaps this says something about how accepting kids are.  We sang a song together and then I asked them if they noticed anything different today.  They looked around and shook their heads.  I said what about me, I didn't brush my hair this morning!  Then they had a big laugh.


Science Experiments:

1. Static Electricity
I love using balloons as they brighten up the room and this time I used balloons to create static electricity.  All you need to do is to rub the balloon back and forth on your hair a few times and then slowly lift it away from your head. What you will see is your hair being attracted by the balloon and it will seam to sand up on your head.


What is happening here is that rubbing the balloon against your hair creates static electricity.  Static electricity is created when there is an imbalance of electrical charges between two objects.  As you run the balloon on your hair you cause the electrons (negatively charged particles) that sit on the surface of your hair to be transferred to the balloon.  The hair is now positively changed and the balloon, because it has more electrons, becomes negatively changed.  Then it is just a question of opposites attract and strands of your hair rise up as they are attracted to the balloon.  This is all due to what is known as the triboelectric effect which about how certain materials become electrically charged after becoming into frictional contact with each other.  But that is way to complex for pre-schoolers, but if you are interested about this effect you can read more here
This is a great experiment to go around during craft time and rub on children's and parents hears so that they can see the effect happening with someone they know.  It is even better if you have a mirror so the children can see themselves

2. How strong is your hair.
This is a fun experiment but a little time consuming, depending how strong your hair is.  The goal of the experiment is to see how much weight a single piece of hair can hold.  I followed the instructions on this video, but I used 5 cent pieces instead of pennies.  My hair was able to hold 75 cents worth of 5 cent pieces.  Encourage children and parents to do this experiment at home as everyone has different types of hair and differing strengths.


Book ideas:


The hair book - Graham Tether
Birdie's big-girl hair - Sujean Rim.
Curly girly - Amanda Tarlau.
Ella Kazoo will not brush her hair - Lee Fox & Cathy Wilcox.
I won't comb my hair! - Annette Langen, Frauke Bahr
Emily's Rapunzel hair - Cecily Matthew
Clara's crazy curls  - by Helen Poole.
Bella’s bad hair day – Stephen Michael King
This monster needs a haircut  -  Bethany Barton.
The man with messy hair – Pamela Allen

Craft activities:

Find a template of a head.  Ask children to draw a face and add some hair.  Use wool, curled cellophane, curling ribbon and paper strips for hair.

Friday, March 25, 2016

Eggs and Easter

To incorporate some fun experiments in an egg or Easter themed storytime session.

This theme gave me the opportunity to do my all time favourite experiment.  I first saw this presented on TV in  Cadbury's chocolate ad performed  by Julius Sumner Miller and always wanted to do it.  However I had to think how to best present this in a library setting.  Professor Miller uses a flaming piece of paper which i didn't think appropriate in the library and also considering the OH&S implications.
However I came across I version using a birthday candle which although had an open flame, was more contained.

Science concepts/experiments:  


Egg into a bottle trick. 
I thought long and hard about how to do this safely in storytime.  Have a boiled egg that is slightly too big to fit into a glass bottle. Put a candle into the top end of the egg and light it.  Hold it underneath the upturned bottle so that it is heating the air in the bottle up.  I got the children to count up to 30 (or you could get them to sing the Happy Birthday song twice).  Then bring the egg up to the mouth of the bottle so that no air can get into the bottle.  The candle will go out and then wait for the egg to be sucked into the bottle.


Why this happens:  The flame heats up the air in the bottle which causes the air to expand. When the bottle is sealed with the egg and the candle goes out, the air cools and shrinks, pulling the egg with it and into the bottle.  Here is a youtube clip demonstrating the experiment.


Raw or boiled eggs?
How to tell the difference between raw eggs and boiled eggs.
This demonstration involves spinning a boiled egg and a raw egg on a table.  Once the egg is spinning well, stop it with your finger.  Do this with both eggs and notice that they behave differently. The raw eggs will continue to spin once you stop it slightly, while the boiled egg will just stop.  Take the egg you now know as boiled and tell the children you are so certain that this is the boiled egg that you will crack it on your head. It gets a big laugh because the children are not as sure as you are and if you are mistaken you will get egg on your face.


Why this happens: This is because the liquid in the raw egg is being effected by centrivical forces, that is, it continues to spin inside the shell of the egg when you stop it.  Don’t believe it...find information here or a video here


Book Suggestions:


Hattie Peck -  Emma Levey.
The cow that laid an egg – Andy Cutbill
Big fat hen - Keith Baker
Hunwick’s egg – Mem Fox
The odd egg  - Emily Gravett
Out of the egg – Tina Matthews
Have you seen my egg? - Penny Olsen
Whose egg? – Jeanette Rowe
Big red hen and the little lost egg – Margaret Wild and Terry Denton

Craft suggestions: 

Stained glass eggs
Egg carton crafts
Chick in an egg
Hatching egg

Friday, March 4, 2016

Sinking and Floating

To experiment with objects that sink or float, and foster curiosity as to why.

Many children know about floating and sinking as they have experienced this frequently, either in the bath or in the pool. Floating objects are fun to play with but children may not have come to a realization as to why things float or sink and so this demonstration can be a fun learning experience.

This theme could also tie in with a pirate storytime and you could set up a clear water container with sand at the bottom and a treasure chest. 

Science concepts/experiments


Water experiment
What types of objects float and what sinks?
Fill a large see-through bowl or container with water.
Collect a variety of different items to test is they sink or float.  Corks, coins (look at small coins compared to large coins), pencils, feathers, paper, stones etc.  Get the children to vote on whether they would sink or float.


Compare the properties of some of the objects.  For example a small coin and a cork weigh about the same however they act differently in the water. Ask children if they have any ideas of why this would be.
Discuss that what objects are make of is important.
Discuss the size of objects and whether you can tell if it will sink of float.
Look at objects that may absorb water such as a sponge or paper which will float for a time but then sink.

Some fun 'tricks' to try in your water container
Find a volcanic rock (pumice rock)and an ordinary rock of a similar size.  The volcanic rock will float as it is filled with air.
Test out a Coke can as compared to a Diet Coke can. You can see what happens here 

Diver in a bottle 
Equipment: plastic bottle, pen lid (not one with a hole in it), plasticine/bluetac.


Fill bottle almost to the top.  You will need to add plasticine to the stem of the pen lid and place in the bottle.  If the lid sinks, remove from bottle (you will probably have to remove all the water just to get the lid out) and remove some of the plasticine.  You need to get the pen lid to just float on the top of the water.  Once this is achieved fill the bottle to almost the top and screw on bottle top well.
Squeeze the sides of the bottle.  What you should see is the pen lid 'diver' sink to the bottom of the bottle.  When you release the bottle the 'diver' returns to the top.


What happens in this experiment is that there is a small air bubble trapped at the top of the pen lid.  When the bottle is squeezed it increases the pressure inside the bottle which decreases the size of the air bubble and the 'diver' sinks.  Once you stop squeezing there original pressure returns, the air bubble expands and the 'diver' rises to the top.  More information on this experiment can be found here


This experiment pairs well with the book Ruby learns to float by Phillip Gwynne where the story talks about Ruby breathing in in order to float.  Talk about how air is needed to float and then explain why the diver sinks. 

Book ideas:


What floats in a moat? – Lynne Berry
Ruby learns to swim – Phillip Gwynne
Who sank the boat? – Pamela Allen
Mr Archimedes Bath – Pamela Allen

Craft:

Make a paper boat

Extra Learning:

During craft time some of the children came up and played with the container of water testing out the objects for sinking and floating. I encourage this curiosity in the children.  Some of the children decided that they could float the boats they made.  They discovered the the boats would sink for a while and then sink.  A lot of the children went home with soggy boats!


Friday, February 26, 2016

Balloons

To have fun with balloons and to introduce children to think about different types of gases.

Balloons equal party, fun and celebrations.  Balloons are great to use with kids and I have used balloons a lot in my STEAM storytimes to demonstrate different concepts.  This session can be used for a birthday theme storytime or for any storytime session that involves celebrations.


I couldn't resist posting this photo of my son on his first birthday!

Science concepts

To blow up a balloon we usually use air.  Air is made up of gas that goes into the balloon. There are different ways to make this gas.

Experiment: 

Blowing up balloons with different gases.
Equipment 
600 ml bottle ¼ filled with vinegar;
Bicarb soda, funnel;
2 balloons;
spoon.

Blow up a balloon and talk about putting gas into the balloon (that comes out of your lungs when you breath).  Tie up balloon.

In another balloon put 2 table spoons of bicard soda (using funnel)
Carefully attach the neck of the balloon to the bottle without the bicarb soda spilling into the bottle.
Hold the balloon upright so the bicarb soda goes into the bottle and watch the solution fizz and the resulting gas fill up the balloon.  When the reaction has finished tie up the balloon.
You can view the demonstration here

Explain to kids how there are different types of gas and the gas in this balloon is carbon dioxide which is heavier then the air around us, including the original balloon that was blown up.  Demonstrate this by holding both balloons and dropping them together and watch how the experiment balloon falls faster.   Let the children have fun dropping the balloons together too.
 

Book suggestions:


Bang went another balloon – Keith Faulkner
Pip and Posy: The big balloon – Axel Scheffler
Seven More Sleeps - Margret Wild and Donna Rawlings
Balloonia – Audrey Wood
Ella and the Baloons in the sky – Danny Appleby
Wibbly pig has 10 balloons – Mick Inkpen

Craft Suggestions:

Make a birthday card with coloured paper balloons of different sizes; or
Cut out a hot air balloon and colour/decorate; or
Buy balloons, blow them up and stick paper to make animals


Friday, February 19, 2016

Shadows

Introducing children to the science of shadows

Children are fascinated with shadows and sometimes a little afraid.  There are funny videos on the internet of children trying to run away from their shadows. Shadows can amuse children for hours as the make different shapes with their hands and bodies.  This session is a great session to explain to children how shadows work. 

Preparation: 

Make a shadow box from a cardboard box and tissue paper. Find the instructions here.
You will also need a strong torch or a desk lamp.
Consider making up your own story and making shadow puppets to do with the story

Science concepts/ experiments:

Use a torch and a tall object and demonstrate the following:
  • Shadows are caused by an object blocking the light
  • The place where the light can’t pass is called a shadow. Objects don't need to be solid to cast a shadow, but they have to be translucent. Show a shadow cast by tissue paper, some sheer fabric or a piece of plastic
  • Shadows move because the light rays change direction. Show them how shadows change, move direction, get longer and shorter, by changing the position of a light source
Find out more about shadows and why they change here


Book suggestions:

Foggy foggy forest - Nick Sharratt
Smartycat: shadows - Jeanette Rowe
Shadow - Robie Harris
Goodnight gorilla - Peggy Rathmann (point out the shadows in the pictures)
At the zoo - Roger Priddy

OR: Make up your own story with shadow puppets and the shadow box

Craft suggestions:

Make shadow puppets using paper cut outs and taping them to sticks.
Let the children use the lightbox with their puppets.

Other useful resources: 

http://www.bbc.co.uk/bitesize/ks2/science/physical_processes/shadows/read/1/


Friday, February 5, 2016

Wind

To explain how wind can be measured and to have some fun blowing things around. 

There is nothing better than a lovely windy day that blows your hair and the leaves around everywhere.  It is difficult to explain to a child where the wind comes from.  It involves air and air pressure and it you would like to find out more you can do so here
However it is fun to see what types of things blow away and how we measure wind via the Beaufort scale

Science concepts/experiments:

Dancing the Beaufort Scale
I explained the Beaufort scale of wind strength using this handout.  I got all the children and adults to stand up to be trees in the garden and then we went though the Beaufort scale. The children were little trees and the adults large trees and as the scale went up parents and children made the corresponding movements. (Eg Moving fingers for leaves, arms for branches, whole body for swaying trees).  The children had lots of fun being trees.

Will it blow away? 
I gathered a few objects light and heavy and we experimented to see if they could be blown away using a hairdryer on low and then high settings. We used object such as cotton wool, leaves, pegs, stones, paperclips, fruit etc.

Ping pong ball balancing experiment
While I had the hairdryer out I thought that I would demonstrate the ping pong ball balancing experiment which is an experiment about balancing air pressure and gravity. All you need is a ping pong ball and a hairdryer. 
Turn the hairdryer on high and gently place the ball in the air stream.  What how it hovers in the air flow. This point is where the air pressure pushing up from the hairdryer 'wind' is equal to gravity.  You can find further explanations of this experiment here.

Book suggestions


The umbrella - Ingrid & Dieter Schubert.
Grandpa and Thomas and the green umbrella - Pamela Allen
A windy day - Sheila M. Bird
Flora's very windy day - by Jeanne Birdsall
The windy farm - Doug MacLeod & Craig Smith.
The windy day - Anna Milbourne
And red galoshes  - Glenda Millard
The wind blew - Pat Hutchins

Craft suggestions

Make your own kite.
Make a pinwheel.  Traditionally these use a split pin in the centre however we have judged them too dangerous for toddlers. Instead I used pipe cleaners to attach the cardboard pinwheel to a long icypole stick which is demonstrated here.   I also pre-punched the middle hole as I thought this would be too tricky for parents and kids.